

How To Stitch Pictures In Photoshop
I'll be the offset to admit that when using my digital SLR photographic camera, I can become a little narrow sighted and stuck looking at the world in a three:2 aspect ratio.
Notwithstanding, when I run into a scene that cries out to be photographed as a panoramic, I similar to think that I'm up to the claiming. So, what's the easiest way to have multiple images and blend them together into a panorama that you tin can exist proud of?
Photoshop makes it incredibly piece of cake to run up multiple images together to create a panorama from scratch and the best part is Adobe Photoshop CS5 does an amazing task that I honestly can't fault, which can't be said for older versions of the software.
In fact it does such a great task that you'll almost never need to position your lens directly over its nodal point and that'due south pretty impressive. The procedure of capturing and creating a panorama is adequately directly forward equally your most to find out:
1. ) Capture Series Of Overlapping Images
Start past capturing multiple images of the same scene using a tripod and making sure that they all overlap evenly and were shot using the aforementioned exposure settings.
If yous wish to employ a Motility Control Head or a Pan Tilt Bracket they volition provide you with more precision and options for creating not only panoramas but time-lapse videos.
ii. ) Open Bridge & Select Sequence Of Images
Open Adobe Span and begin browsing to identify which images would be ideal for superimposing to create your panorama.
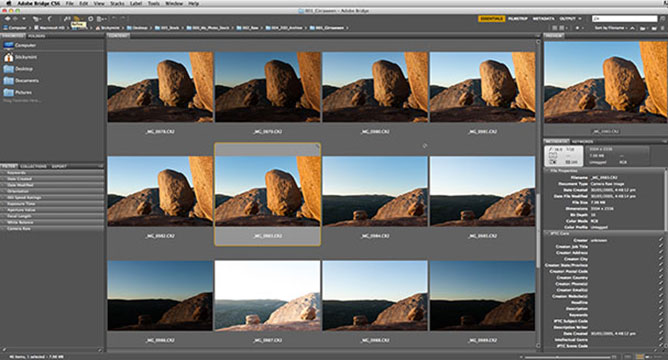
Keeping in listen that the alignment, move and exposure of each frame can influence how realistic and seamless the cease result.
Afterward labelling and rating your files, select them past property downwardly the Ctrl (Windows) or Control (Mac) key and clicking on each photo. And then import your images into Photoshop past right-clicking on the selection and choosing open up with Camera Raw.
3. ) Edit Images Within Camera Raw Or Lightroom
Open and edit all images identically inside Adobe's Photographic camera Raw. Save all images with the same resolution, colour profile working space and file format to ensure consistency.
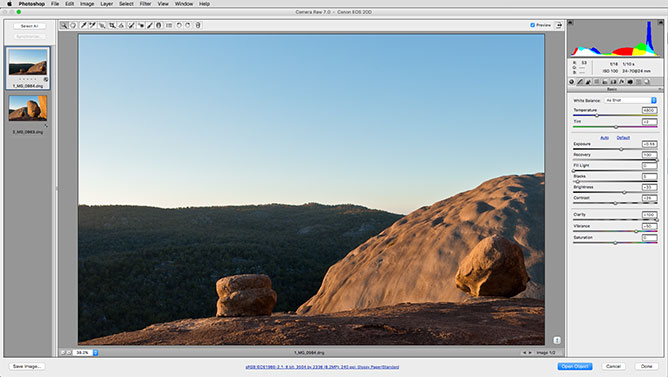
Finally, open all of your saved images within Photoshop.
4. ) Open Photomerge In Photoshop
In Photoshop go to the main navigational menu and select… File / Automate / Photomerge…

One time the photomerge dialog window appears yous'll be asked to select and open all the images that go together to make up your panorama.
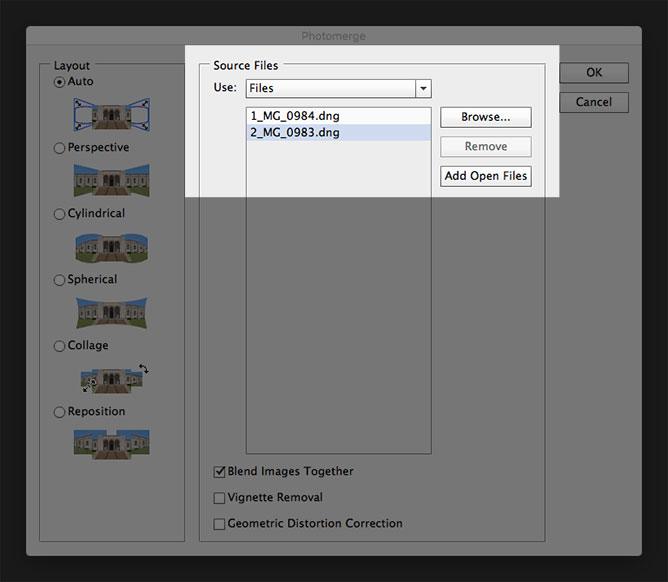
5. ) Select Layout Pick
In the layout settings, select the type of panorama you're creating. In most cases, yous can become away with using the "motorcar" option, unless of course you lot know exactly what type of lens distortions are within your photographs.
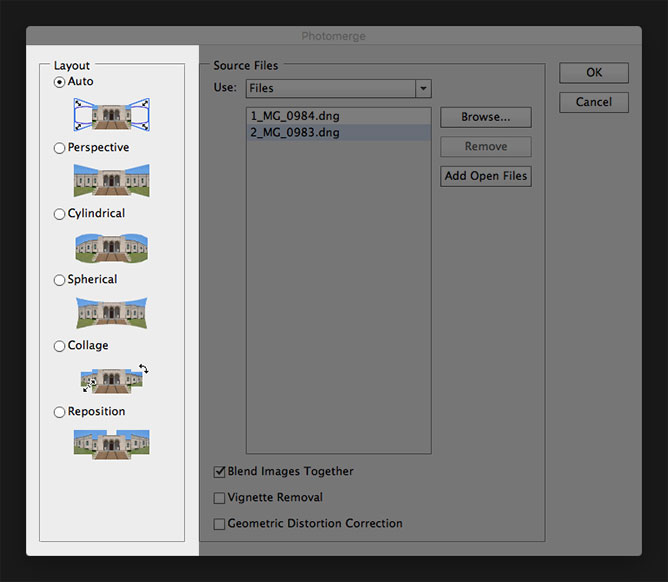
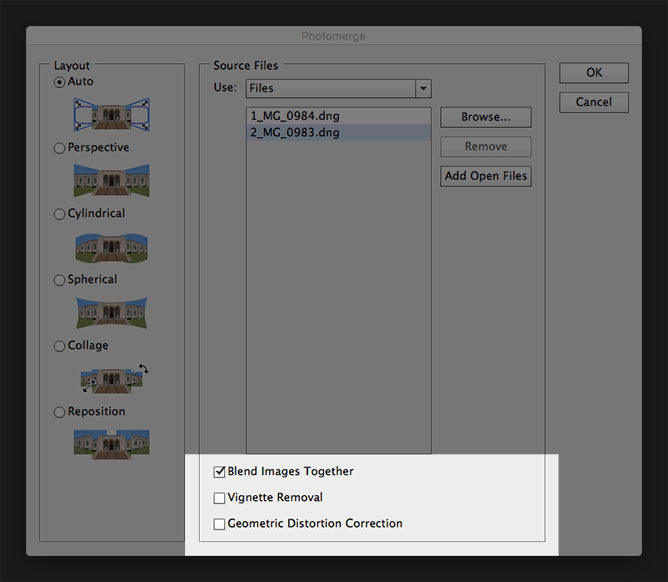
Finally, brand sure you take "Blend Images Together" checked then choose whether or not y'all would similar "Vignette Removal" and/or "Geometric Distortion Correction" applied. Then click "OK".
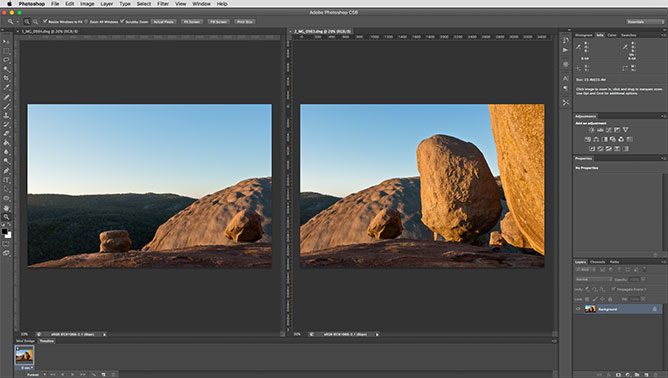
half dozen. ) Check For Imperfections
Double check the quality of the merge and look for any imperfections that may take occurred in the stitching process that crave your attention to fix. In nigh cases you will need to view your prototype at fifty-100 percent in order to visually detect whatever problem areas.
If you focus your attention predominantly around where the images have been stitched together you tin can't really go incorrect. By turning off individual layers you'll be able to see where the layer masks connect.
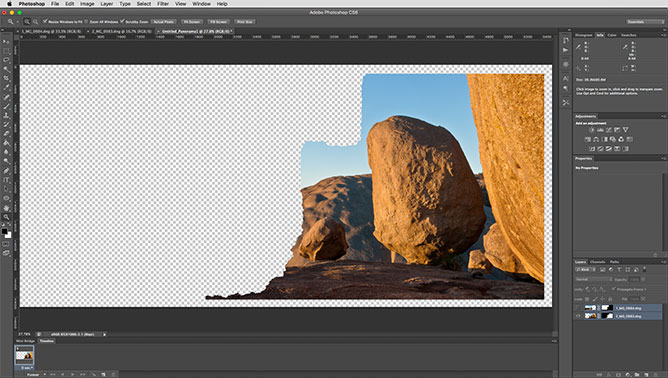
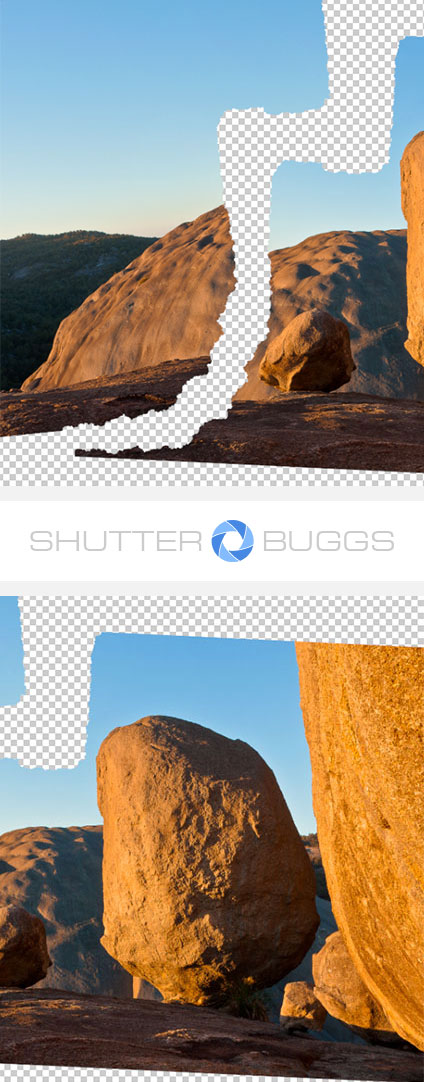
7. ) Crop Image
1 of the mutual bug you may face with your panorama is that your image maybe missing sections either elevation, bottom or on either side.

If this happens you have two options. Either crop your image tightly and piece of work with what you've got or utilize Photoshop'south content-aware fill to make full in these areas. Content-aware fill isn't perfect, only information technology does give you a slap-up starting point from which you tin can piece of work from.)
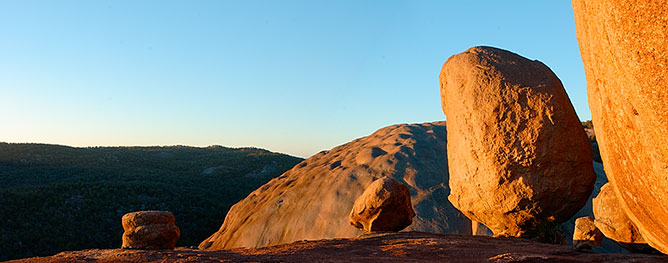
I recall you'd agree that the results speak for themselves… I hope you constitute this tutorial to be helpful and informative. If you accept any further questions that I haven't answered, delight don't hesitate to enquire them in the comments below.
![]()
Annabella Dean is a passionate photographer that loves travelling around the world capturing every moment with her camera. With the completion of her Bachelor of Photography, she continues working on refining her arts and crafts.
Source: https://www.shutterbuggs.com/how-to-stitch-photos-together-in-photoshop/
Posted by: melendezyouch1992.blogspot.com
0 Response to "How To Stitch Pictures In Photoshop"
Post a Comment